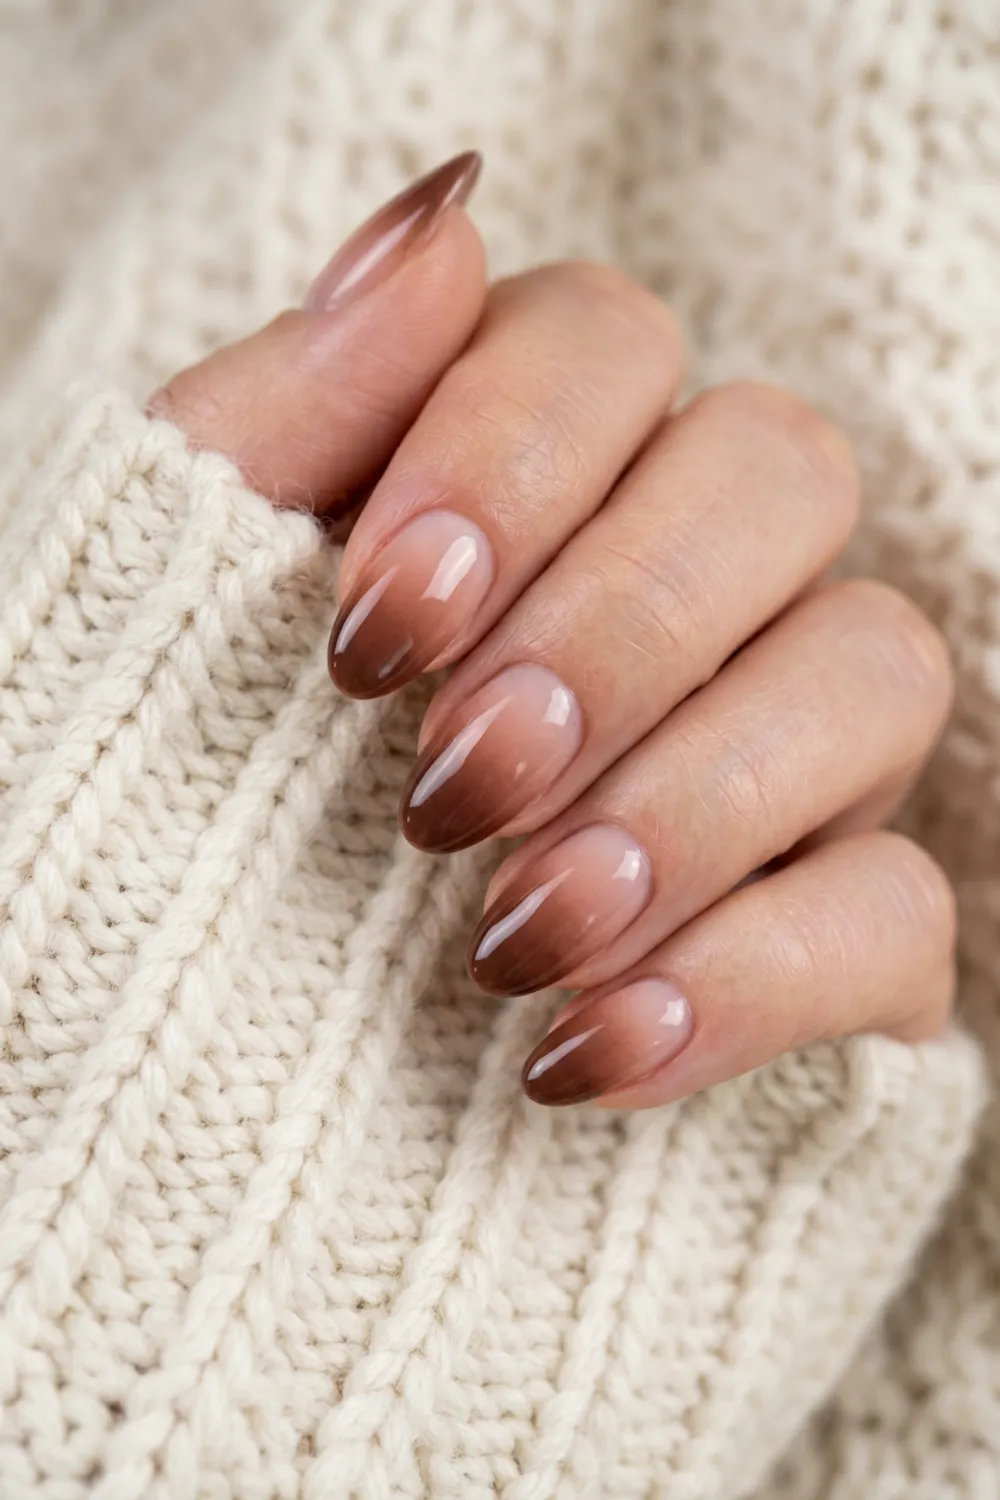
Mocha ombre is the brown manicure for people who don't want a dark manicure. The color melts from a sheer nude near the cuticle into a warm coffee brown at the tip, so it looks soft up close and rich from across the room.
Below are the mocha ombre looks worth trying, what to ask for at the salon, and a simple way to try it at home. If you like the shade but want a single color, our brown nude nails guide is the next stop.
What are mocha brown ombre nails?
A gradient manicure that blends a nude or milky base into a mocha brown, usually lightest at the cuticle and darkest at the tip. Techs create the fade with a sponge, an airbrush, or by blending gel with a brush, so there's no hard line between the two shades.
Mocha ombre designs
Save the one closest to your nail length and shape. That's the photo to show your nail tech.
1. Classic nude to mocha fade
The fade starts around the middle of the nail and deepens to mocha at the tip. Because the cuticle area stays nude, grow-out is barely noticeable.
Ask for:almond shape, sheer nude base, mocha ombre from the middle to the tip, glossy top coat.
2. Chocolate ombre tips
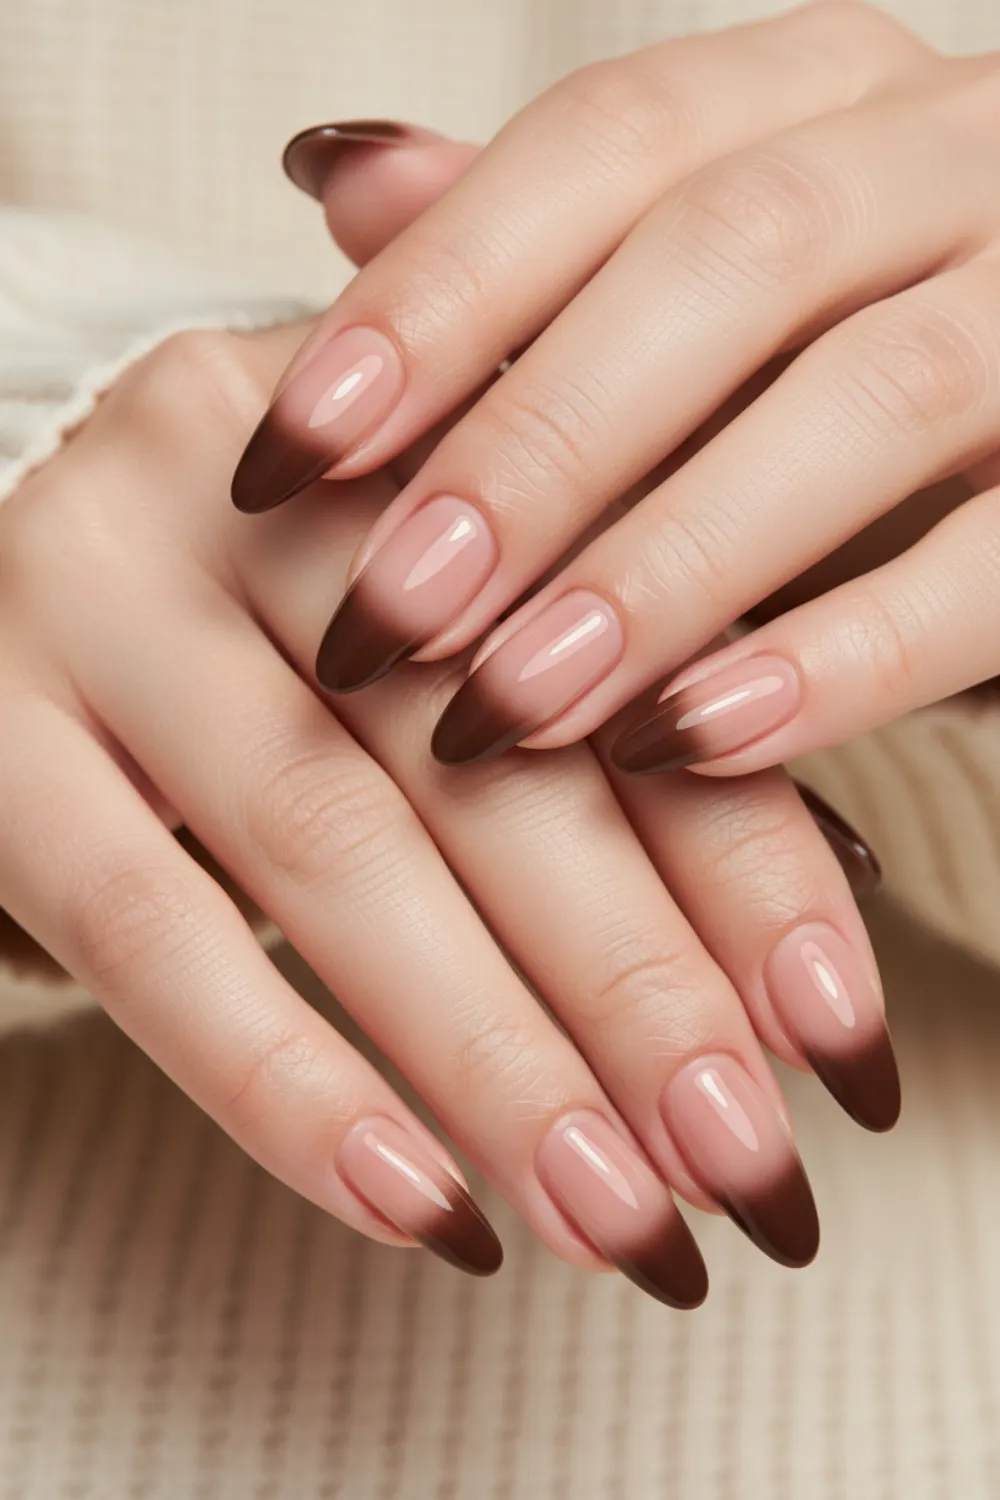
A shorter, darker fade that sits just on the tips, somewhere between an ombre and a French manicure. It's a good option if you want more contrast than the classic version.
Ask for:almond shape, pale nude base, short chocolate ombre on the tips only.
3. Reverse ombre
The dark mocha sits at the cuticle and fades out toward a nude tip. It's more of a statement, and it needs a neat cuticle line because that's where your eye goes.
Ask for:reverse ombre, mocha at the cuticle fading to a sheer tip.
4. Mocha ombre with a glazed finish
The classic fade with a pearly chrome powder rubbed over the top, for a glossy, almost glazed look. The shimmer softens the brown even more.
Ask for:nude to mocha ombre, white or pearl chrome powder on top.
5. Mocha to caramel
Instead of fading into nude, the color moves between two browns: caramel near the cuticle, mocha at the tip. It's warmer and a little more autumnal than the classic look.
Ask for:caramel to mocha ombre, blended with no visible line.
6. Gradient skittle nails
Each nail is a single shade, getting a little darker from thumb to pinky: nude, latte, caramel, mocha, espresso. It's the ombre idea spread across the whole hand, and easy to do at home.
Ask for:five creme browns from light to dark, one per nail, in order.
7. Mocha aura nails
A soft cloud of mocha airbrushed into the center of each nail, fading out toward the edges. It's the same color story as ombre, just diffused.
Ask for:aura nails, mocha center on a nude base, airbrushed.
Picking your two shades
An ombre is only as good as the pair of colors you choose. For the classic look, start with a sheer nude or milky pink close to your natural nail, then choose a mocha one or two steps deeper than your skin tone. If the gap between the two shades is too big, the fade looks stripy instead of smooth. If it's too small, the ombre disappears.
A quick test: paint both shades side by side on one nail. If they look like two colors that belong together, they'll blend well.
Salon methods, explained
Knowing the method helps you ask for the finish you want.
- Sponge: polish or gel dabbed on with a makeup sponge. It gives a soft, slightly textured fade that a top coat smooths out.
- Airbrush: the most seamless fade, with no texture at all. Not every salon has an airbrush, so ask when you book.
- Brush-blended gel: the two gel shades are painted on and blended with a brush before curing. It's precise and works well for short ombre tips.
All three last as long as the base product does, so a gel ombre should last about as long as a regular gel manicure.
How to do mocha ombre at home
The sponge method works with regular polish and takes a bit of practice, so try it on one hand first.
- Apply a base coat and one coat of your nude shade. Let it dry.
- Paint a stripe of nude and a stripe of mocha side by side on a makeup sponge, slightly overlapping.
- Dab the sponge onto the nail, with the mocha stripe toward the tip, rocking it slightly to blend.
- Repeat two or three times to build the color, letting it dry a little between layers.
- Clean the skin around the nail with a small brush dipped in remover, then seal with a glossy top coat.
The top coat smooths out the sponge texture, so don't skip it.
Who mocha ombre suits
It works on almost any length and shape, but the fade has the most room to blend on medium almond or oval nails. On very short nails, keep the fade to the top third of the nail.
FAQ
What's the difference between mocha and chocolate ombre?
Mocha is a lighter, milky coffee brown, so the fade looks soft. Chocolate is deeper and gives more contrast against the nude base.
Does ombre grow out well?
Yes, as long as the lighter shade is at the cuticle. New growth sits next to the nude part of the fade, so it's much less obvious than with a solid color.
Is mocha ombre the same as a baby boomer manicure?
They use the same technique. A baby boomer manicure fades pink into white, while mocha ombre fades nude into brown.
How long does a mocha ombre last?
About as long as the product underneath. A gel ombre lasts as long as a regular gel manicure, while a regular polish ombre needs a fresh top coat every few days to stay smooth.
Can I do mocha ombre on short nails?
Yes. Keep the darkest part to the top third of the nail so the fade still has room to blend.
The bottom line
If you want brown nails that still feel soft, start with the classic nude to mocha fade on almond nails. Save the look, bring it to your appointment, and ask for the fade to start around the middle of the nail. Want something more defined? Try brown coffin nails or browse more nail ideas.